Certificate Setup in NSS database (FIPS)
- Tran Tang (Unlicensed)
Generate Entrust Certificates
NOTE: Federal agencies or organizations who are sponsored by a federal agency under contract or have been awarded funds for the exchange of health information with a federal agency meet the requirements (as defined in the Nationwide Health Information Network Onboarding Process) to use the following information to request a test certificate. Organizations that do not have a contract nor have been awarded funds for the exchange of health information with a federal agency can generate self signed certificates and utilize those for testing. Any entity that your gateway is tested with will need to trust the root of the self signed certificate.
The images included below are thumbnails. Click on an image to enlarge.
1) The Entrust site is IE browser specific. If an adopter's servers are Linux- or Solaris-based several files will need to be moved from and to the adopter's Windows machine to its server machine
Go to: https://nfitestadmin.managed.entrust.com/cda-cgi/clientcgi.exe?action=start&reason=0
On the left – Select CA Certificates \ Install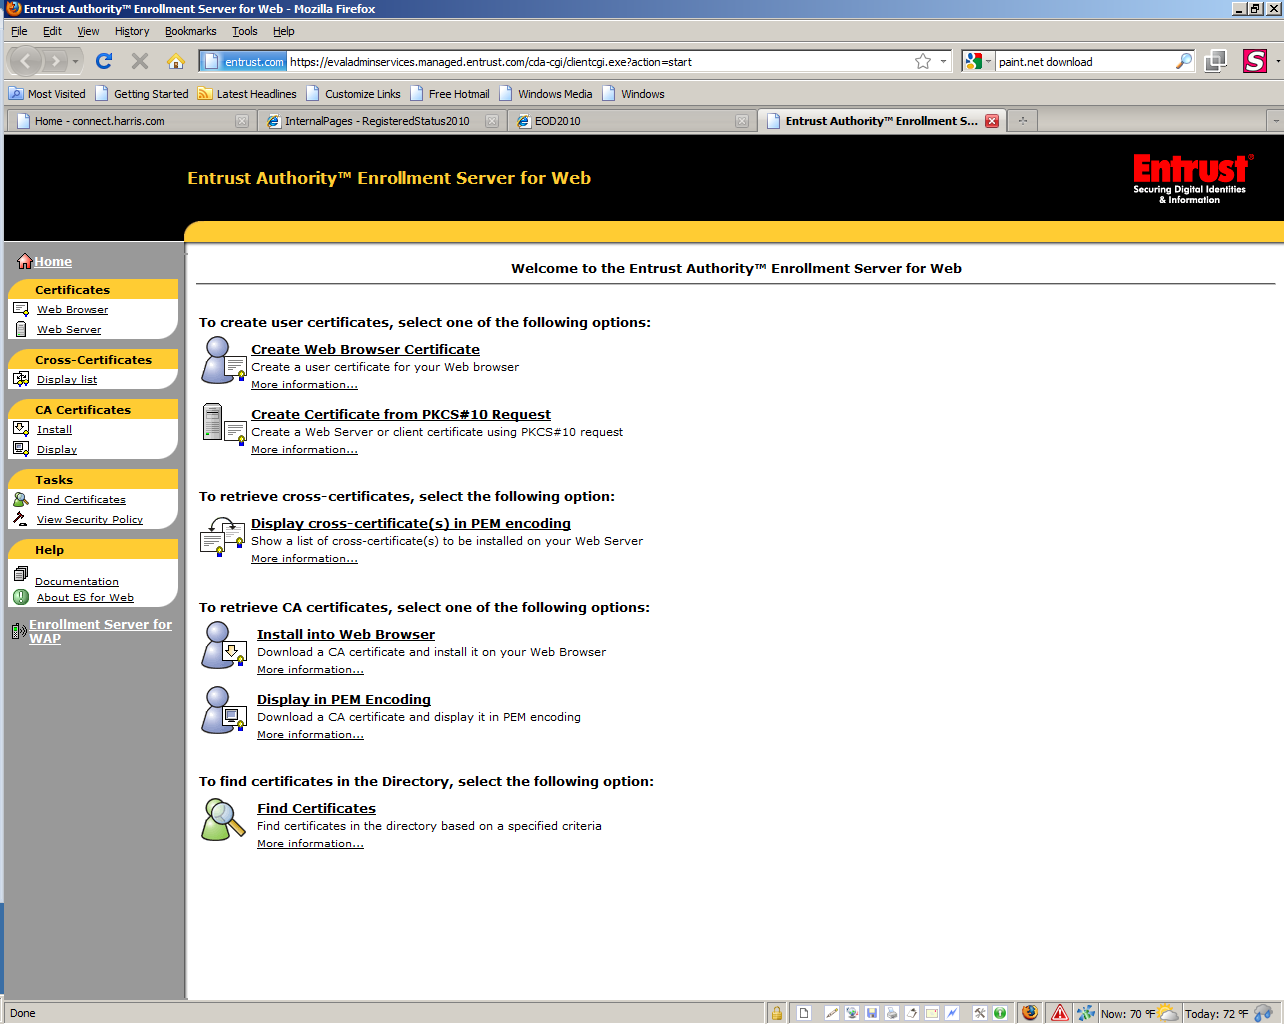
2) When this pop-up window appears, select Open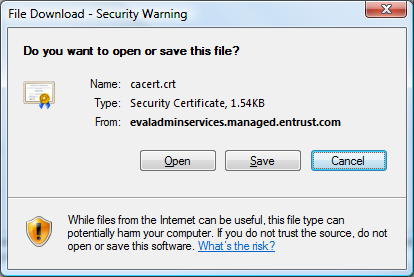
3) The certificate details for the DComRootCA will be displayed. Select "Install Certificate..."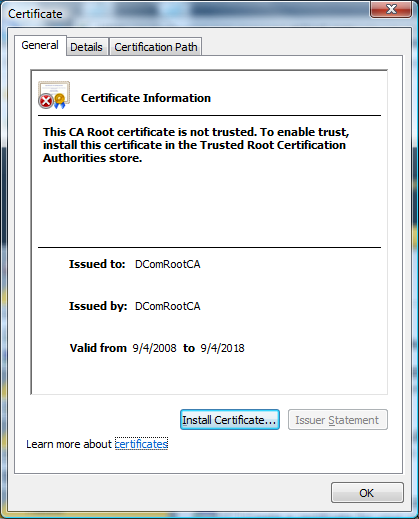
4) Navigate through the Wizard. Select Next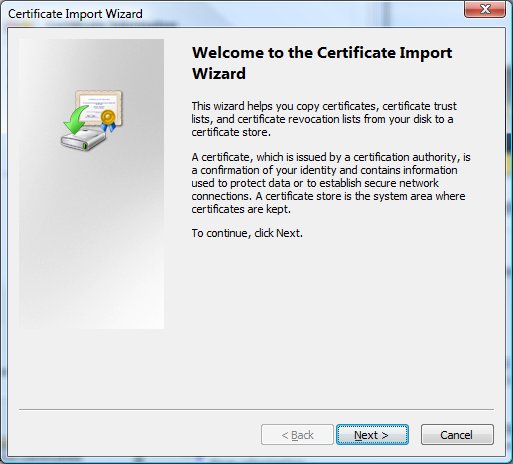
5) Select the option to "Place all certificates in the following store."
Then Browse to select "Trusted Root Certification Authorities"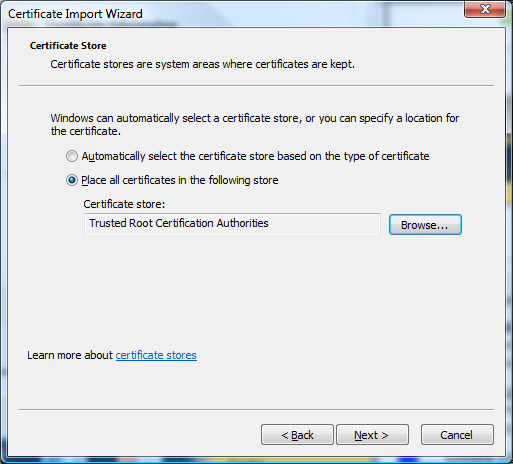
6) The confirmation window will show your setting. Select Finish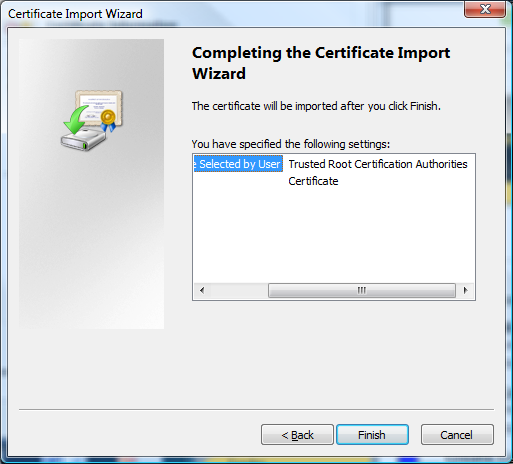
7) Confirm the installation by selecting "Yes"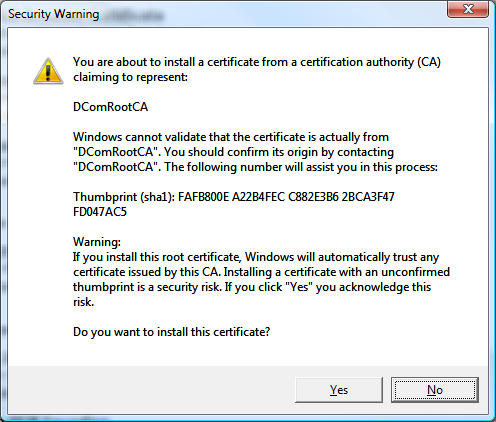
8) Then acknowledge the import by clicking "OK"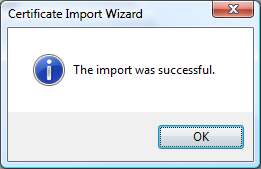
9) To verify the installation of the certificate, select the "Tools" drop down, then "Internet Options" to bring up the Internet Options pop-up window. Select the Content tab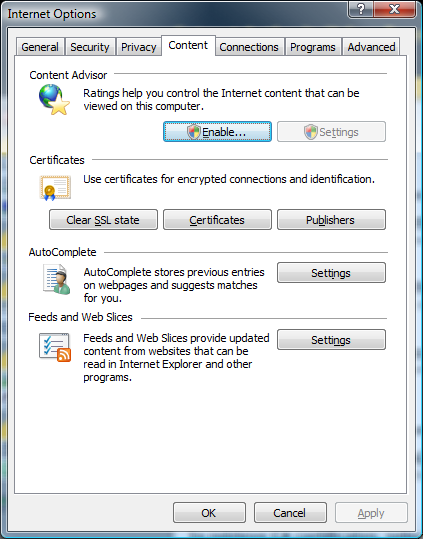
10) Select the "Certificates" button to bring up the Certificates pop-up. Select the Trusted Root Certification Authorities tab and confirm the presence of the DComRootCA certificate in the list.
At this point it is okay to close and exit the pop-ups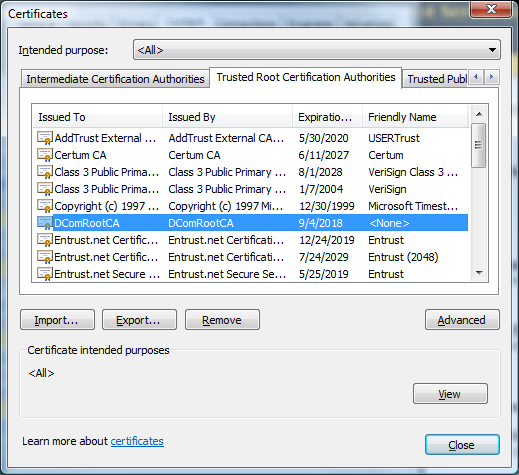
11) To be able to generate a Web Certificate an adopter will need to email ONC.ExchangeInfo@hhs.gov its full computer name to use as the domain name. This will be something like: "SC075311.cs.myharris.net". They will return, in 2 separate emails, an Authorization Code and a Reference Number that the adopter can then use to create a signed certificate
12) Create a work area such as: C:\Sun\AppServer\certificaterequests (Windows) or /nhin/certificaterequest (Solaris)
From here forward, nssdomain is a reference to the actual domain name, which is likely to be domain1
Note:
Add <NSS-3.12.4_install_Folder>\bin to PATH
Add <NSS-3.12.4_install_Folder>\lib to PATH
mkdir C:\Sun\AppServer\certificaterequests
For the domain name, an adopter must use the Reference Number provided as the "COMMON_NAME", "nhin-test" as the organizational unit, and "entrust" as the organization.
Windows:
cd C:\Sun\AppServer\certificaterequests
%NSS_HOME%\bin\certutil -R -k rsa -s "CN=COMMON_NAME,ou=nhin-test,o=entrust" -o server.csr -v 12 -a -d %AS_HOME%\domains\nssdomain\config
Solaris:
cd /nhin/certificaterequest
$NSS_HOME/bin/certutil -R -k rsa -s "CN=COMMON_NAME,ou=nhin-test,o=entrust" -o server.csr -g 2048 -v 12 -a -d $AS_HOME/domains/nssdomain/config
13) Verify this certificate request by opening the server.csr file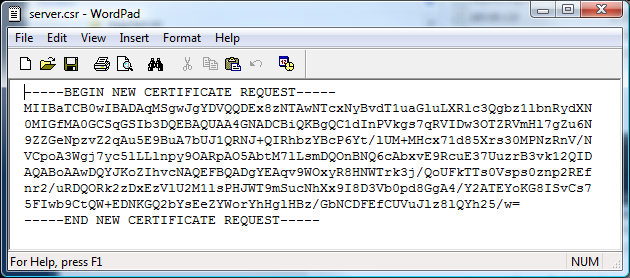
14) From the Entrust web site (https://nfitestadmin.managed.entrust.com/cda-cgi/clientcgi.exe?action=start&reason=0), select the "Create Certificate from PKCS#10 Request."
Enter the Reference Number, Authorization Code, and the text from the Certificate Request (the self-signed certificate that was created earlier) into the text box. Select the complete text from "BEGIN NEW CERTIFICATE REQUEST" to "END NEW CERTIFICATE REQUEST".
Select "Submit Request"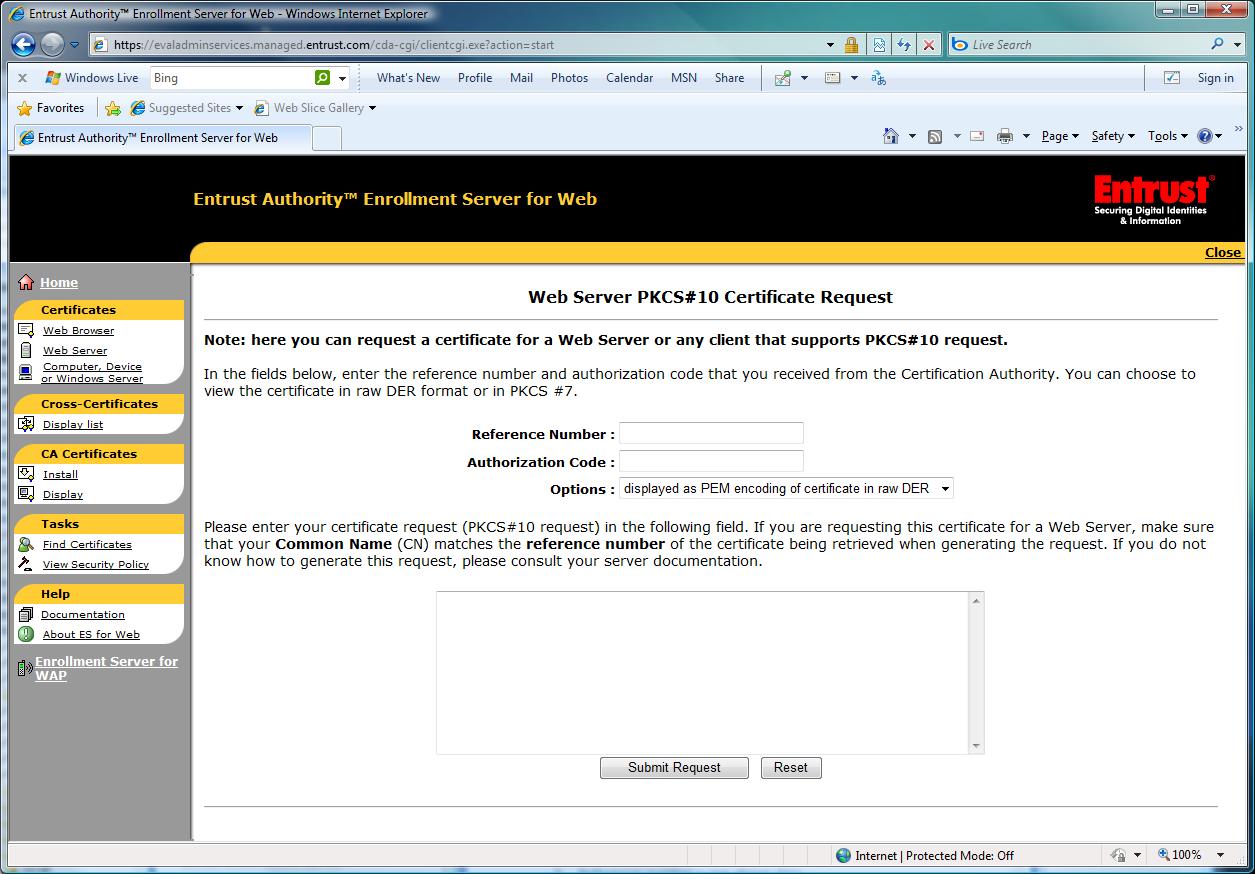
16) This will generate a Web Server Certificate.
Select Download to save the servercert.bin file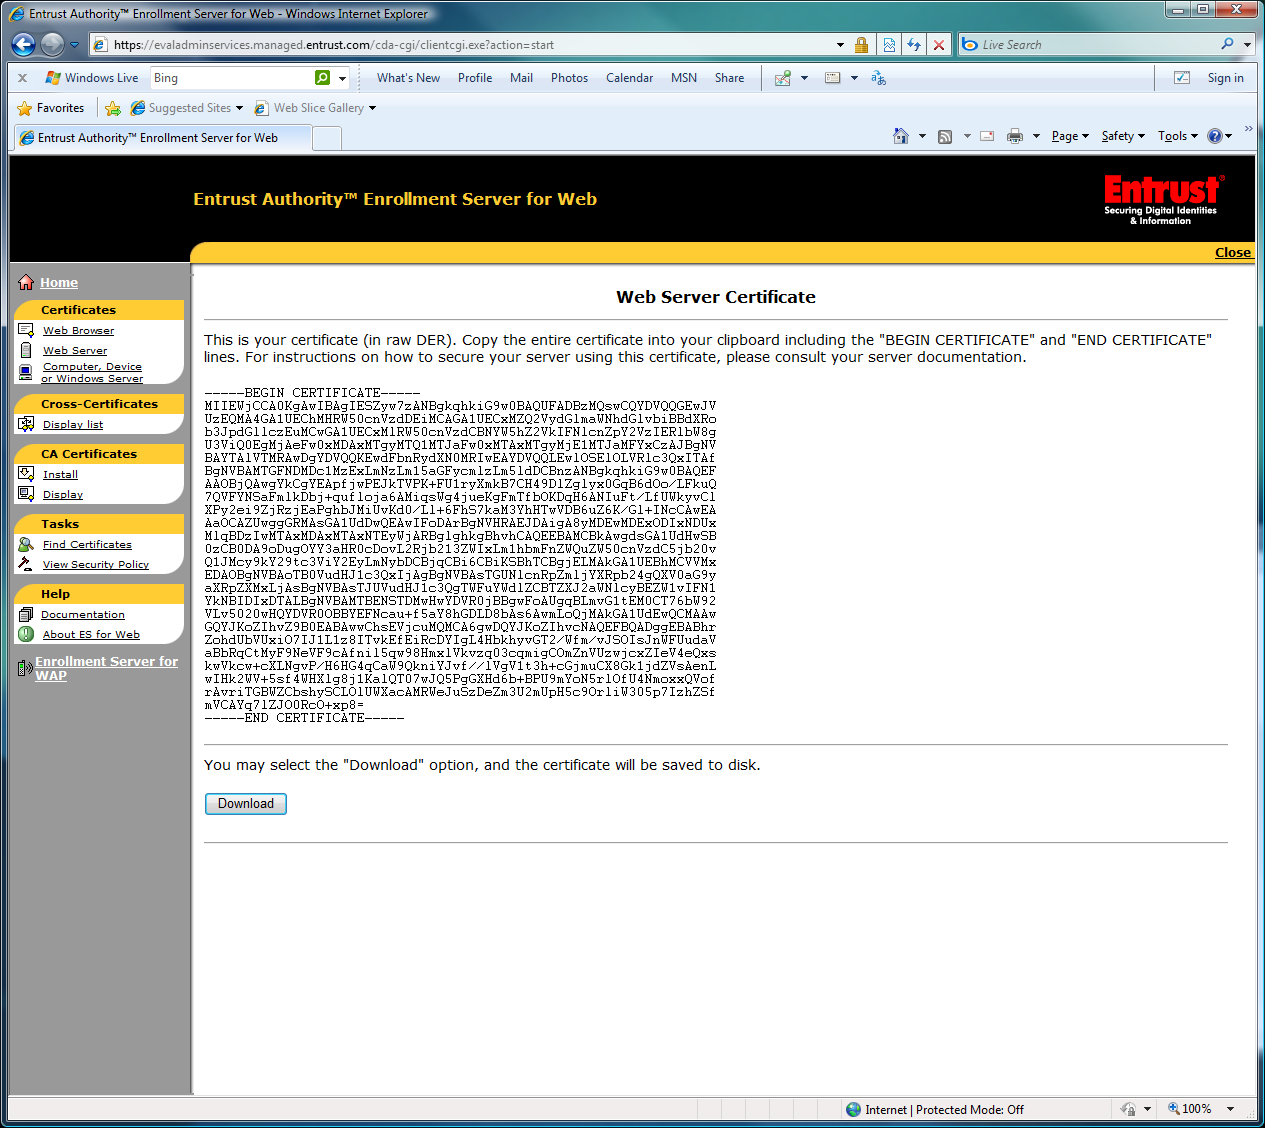
17) On the left hand side of the window, select "Install" in the CA Certificates area. Select "Trust this CA to identify web sites," then click "OK." Then select "Display" in the CA Certificates area.
Select the complete text from "--- BEGIN CERTIFICATE ---" to "--- END CERTIFICATE ---". Copy this into a file called cacert.crt. and save the cacert.crt file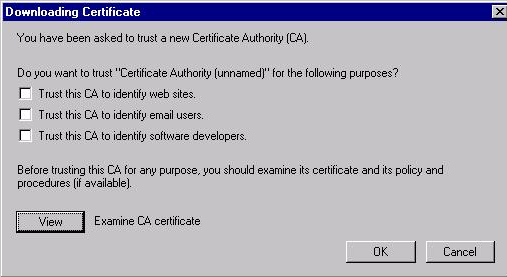
18) On the left hand side of the window, select "Display list" in the Cross-Certificates area.
Select the complete text from "BEGIN CERTIFICATE" to "END CERTIFICATE". Copy this into a file called cross.crt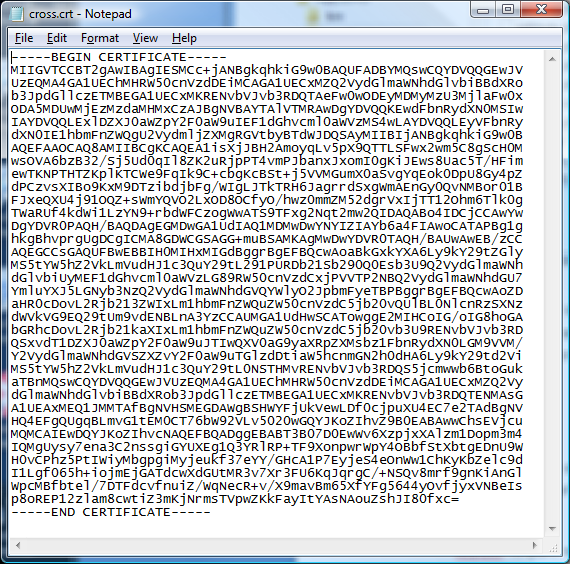
19) Import the entrust root certificate, the intermediate cross certificate, and the web server certificate into the truststore:
%NSS_HOME%\bin\certutil -A -n "gateway" -t "u,u,u" -i C:\Sun\AppServer\certificaterequests\servercert.bin -d %AS_HOME%\domains\nssdomain\config
%NSS_HOME%\bin\certutil -A -n "entrust" -t "T,C,C" -i C:\Sun\AppServer\certificaterequests\cacert.crt -d %AS_HOME%\domains\nssdomain\config
%NSS_HOME%\bin\certutil -A -n "entrust-cross" -t "T,C,C" -i C:\Sun\AppServer\certificaterequests\cross.crt -d %AS_HOME%\domains\nssdomain\config
20) Confirm that the contents of the NSS database keystore include the gateway cert, entrust, and entrust-cross:
%NSS_HOME%\bin\certutil -L -n gateway -d %AS_HOME%\domains\nssdomain\config
%NSS_HOME%\bin\certutil -L -n entrust -d %AS_HOME%\domains\nssdomain\config
%NSS_HOME%\bin\certutil -L -n entrust-cross -d %AS_HOME%\domains\nssdomain\config
21) Enable FIPS Mode:
modutil -fips true -dbdir %AS_HOME%\domains\nssdomain\config
22) Make sure the Glassfish Application Server is stopped, then navigate to the domain configuration directory (i.e. C:\Sun\AppServer\domains\domain1\config). Adopters should make sure that they have a backup of the domain.xml
Note: Skip step 23 for CONNECT 3.1, since this version has a FIPS domain template configured
23) Edit the domain.xml file to set up to use the new certificates
a. Find all occurrences of s1as and replace with gateway
b. Set the jvm-options to use the new keystores
Windows:
<jvm-options>-Djavax.net.ssl.keyStore=${com.sun.aas.instanceRoot}/config/gateway.jks</jvm-options>
<jvm-options>-Djavax.net.ssl.trustStore=${com.sun.aas.instanceRoot}/config/cacerts.jks</jvm-options>
<jvm-options>-Djavax.net.ssl.keyStorePassword=changeit</jvm-options>
<jvm-options>-Djavax.net.ssl.trustStorePassword=changeit</jvm-options>
<jvm-options>-Djavax.net.ssl.keyStoreType=JKS</jvm-options>
<jvm-options>-Djavax.net.ssl.trustStoreType=JKS</jvm-options>
<jvm-options>-DSERVER_KEY_ALIAS=gateway</jvm-options>
<jvm-options>-DCLIENT_KEY_ALIAS=gateway</jvm-options>
Solaris:
<jvm-options>-Djavax.net.ssl.keyStore=/nhin/SUNWappserver/domains/domain1/config/gateway.jks</jvm-options>
<jvm-options>-Djavax.net.ssl.trustStore=/nhin/SUNWappserver/domains/domain1/config/cacerts.jks</jvm-options>
<jvm-options>-Djavax.net.ssl.keyStorePassword=changeit</jvm-options>
<jvm-options>-Djavax.net.ssl.trustStorePassword=changeit</jvm-options>
<jvm-options>-Djavax.net.ssl.keyStoreType=JKS</jvm-options>
<jvm-options>-Djavax.net.ssl.trustStoreType=JKS</jvm-options>
<jvm-options>-DSERVER_KEY_ALIAS=gateway</jvm-options>
<jvm-options>-DCLIENT_KEY_ALIAS=gateway</jvm-options>
c. Enable 2-way SSL and turn on extra logging if desired.
Enable mutual authentication of certificates in the domain.xml file, by setting the client-auth-enabled attribute of the ssl element in the secure (port 8181) http-listener to true. This would appear as:
<http-listener acceptor-threads="1" address="0.0.0.0" blocking-enabled="false" default-virtual-server="server"
enabled="true" family="inet" id="http-listener-2" port="8181" security-enabled="true"
server-name="" xpowered-by="true">
<ssl cert-nickname="gateway" client-auth-enabled="true" ssl2-enabled="false" ssl3-enabled="true"
tls-enabled="true" tls-rollback-enabled="true"/>
</http-listener>
Extra logging can be enabled through these jvm-options:
<jvm-options>-Djavax.net.debug=ssl:handshake:verbose</jvm-options>
<jvm-options>-Djava.security.debug=certpath</jvm-options>
24) Edit the domain.xml file to set up using the new master password now that the nssdomain has been created
Find all occurrences of the nss.db.password and replace the password with the "master" password that was used during the creation of the nssdomain:
<jvm-options>-Dcom.sun.appserv.nss.db.password=changeit</jvm-options>
NOTE: If the default password was chosen during the creation of the nssdomain, the default password will be "changeit"
24) Restart Glassfish to verify jvm settings and keystores
Note: The domain for FIPS will be nssdomain